QuickBooks Online integration
How to set up and configure the QuickBooks Online (QBO) integration in Engine.
← Back to Accounting integrations
1. Open the QBO integration from Settings
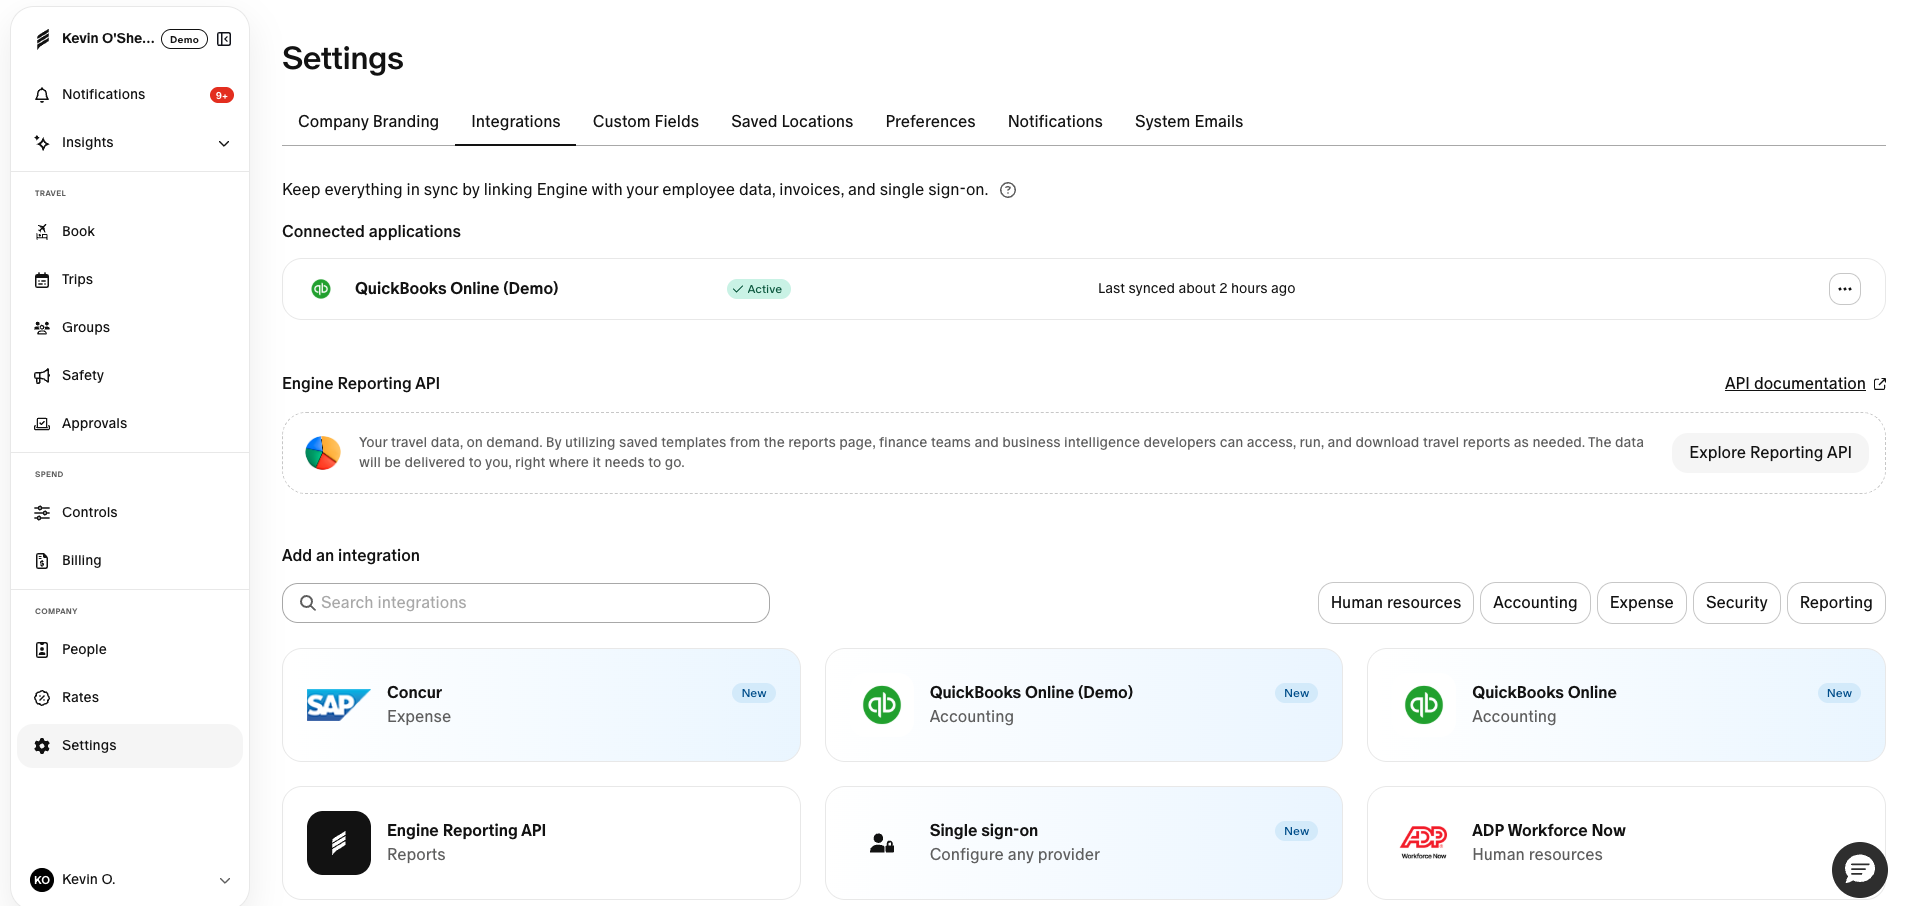
- In Engine, you must be an admin.
- Navigate to Settings → Integrations.
- Find the QuickBooks tile.
- Important prerequisite: you must have Direct Bill or Engine X enabled in Engine to access the QBO integration.
2. Complete the QuickBooks authentication flow
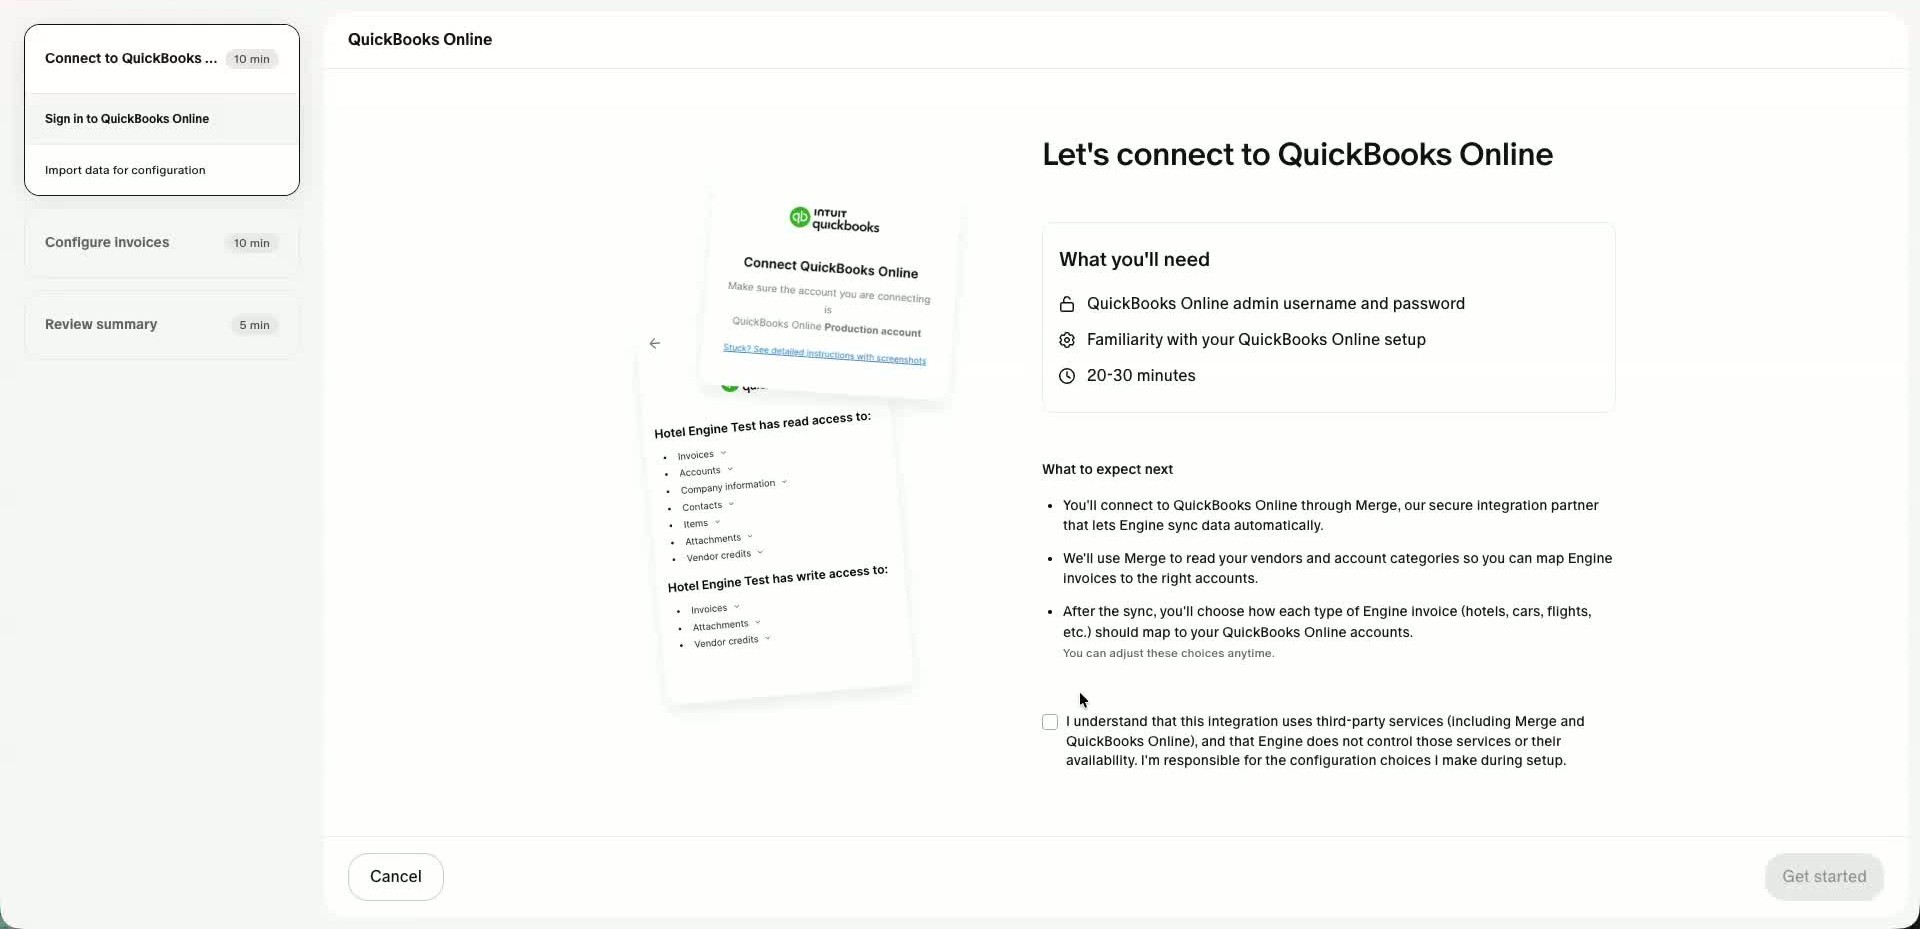
- Click the QuickBooks tile.
- Accept the notice that Engine uses Merge for connecting to QBO.
- In the Merge pop-up, confirm you are the admin and choose Production Data.
- Click Next, then Open Window to launch the QuickBooks login page.
- Log into QuickBooks and grant access. This will complete authentication.
3. Wait for Engine to sync QuickBooks data
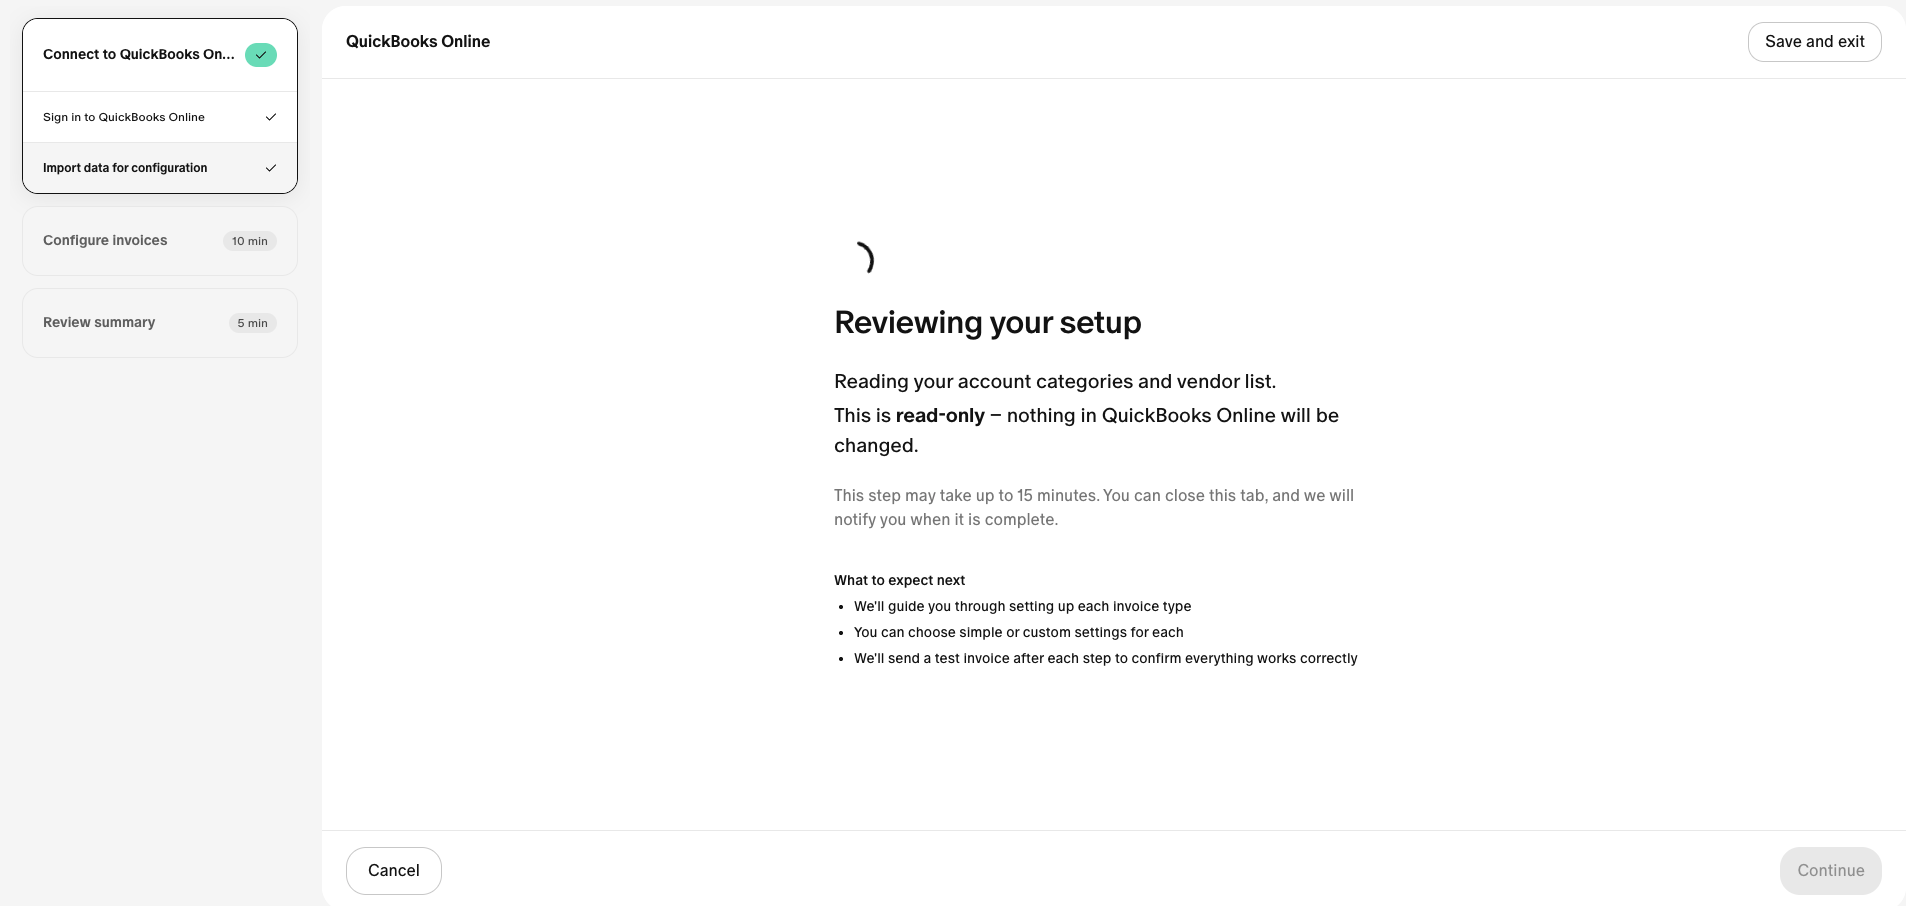
- After authentication, Engine begins syncing QuickBooks data into the platform — this could take a few hours depending on the complexity of your QBO data.
- Synced data includes:
- Vendor lists
- Chart of accounts
- Field-specific valid values
- Other mapping-related accounting data
- The spinning indicator means the sync is in progress.
- Once complete, you will see an All done screen and can continue to setup.
4. Choose which invoice types to configure
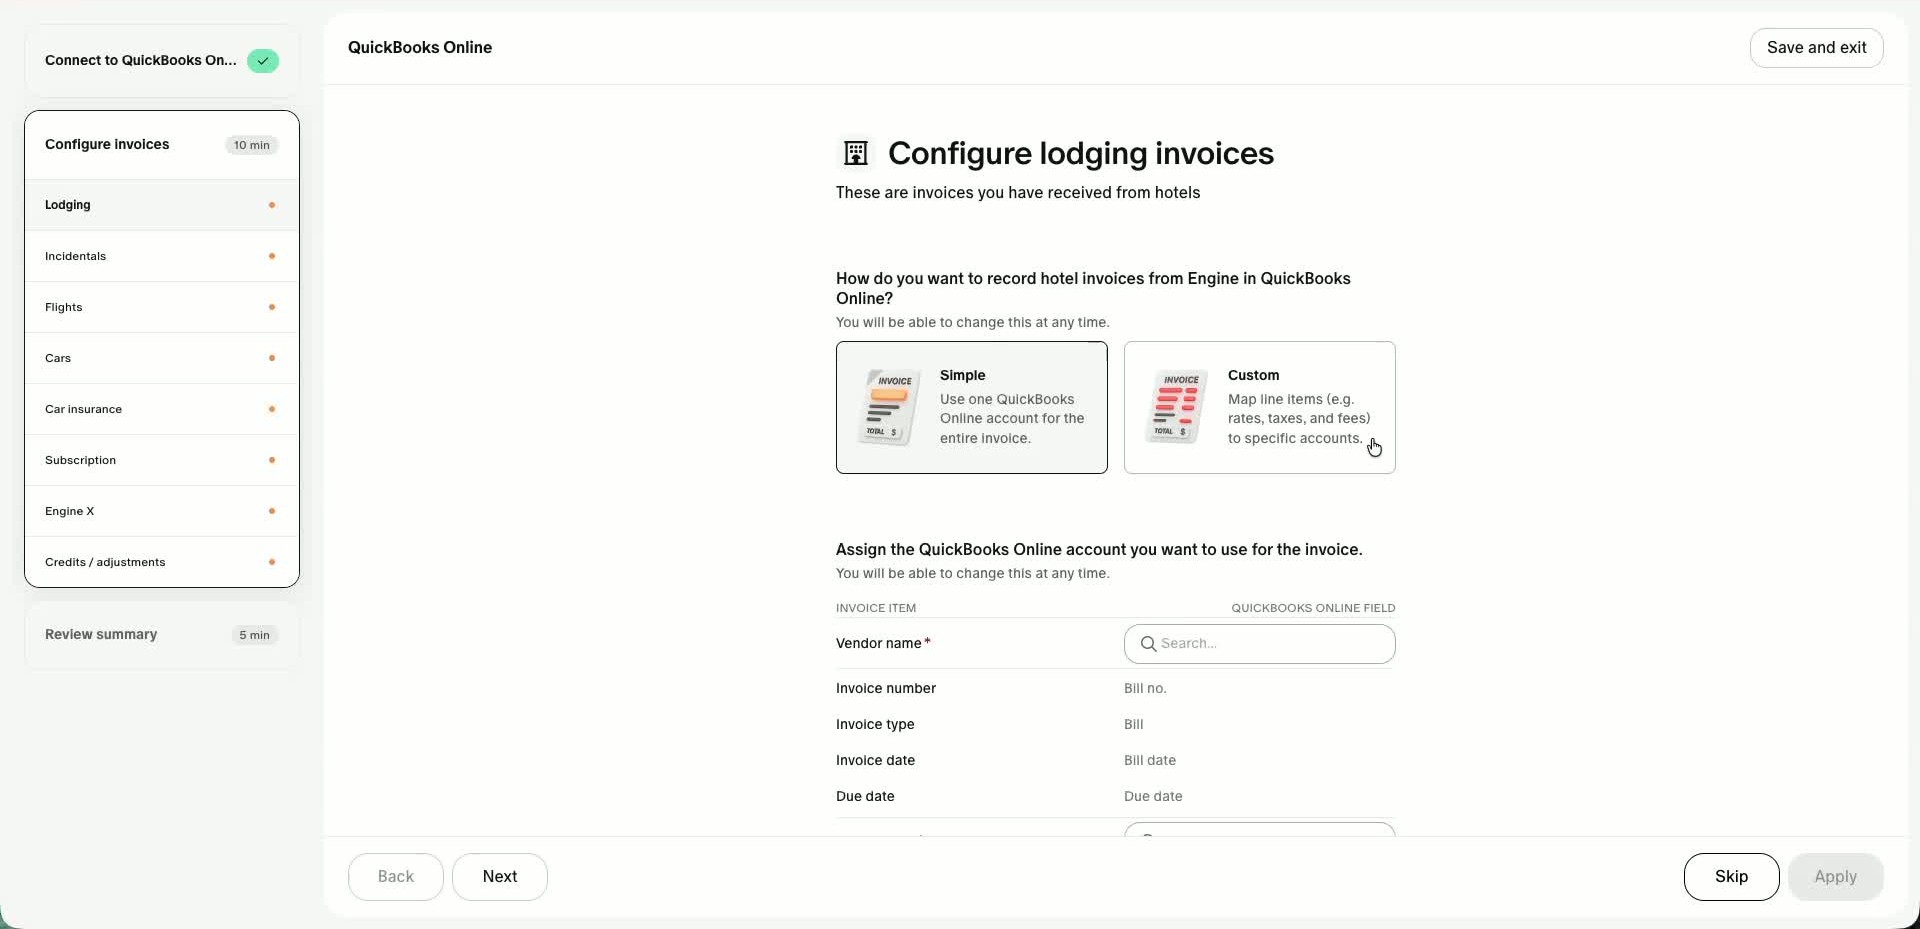
- The left rail shows the invoice types Engine can sync to QuickBooks:
- Lodging
- Incidentals
- Flights
- Cars
- Car insurance
- Subscription
- Engine X
- Credits / adjustments
- You have the option to configure just the invoice types you plan to use.
- You can skip any invoice types you do not need.
- In the walkthrough, lodging is used as the example.
5. Select simple or custom mapping
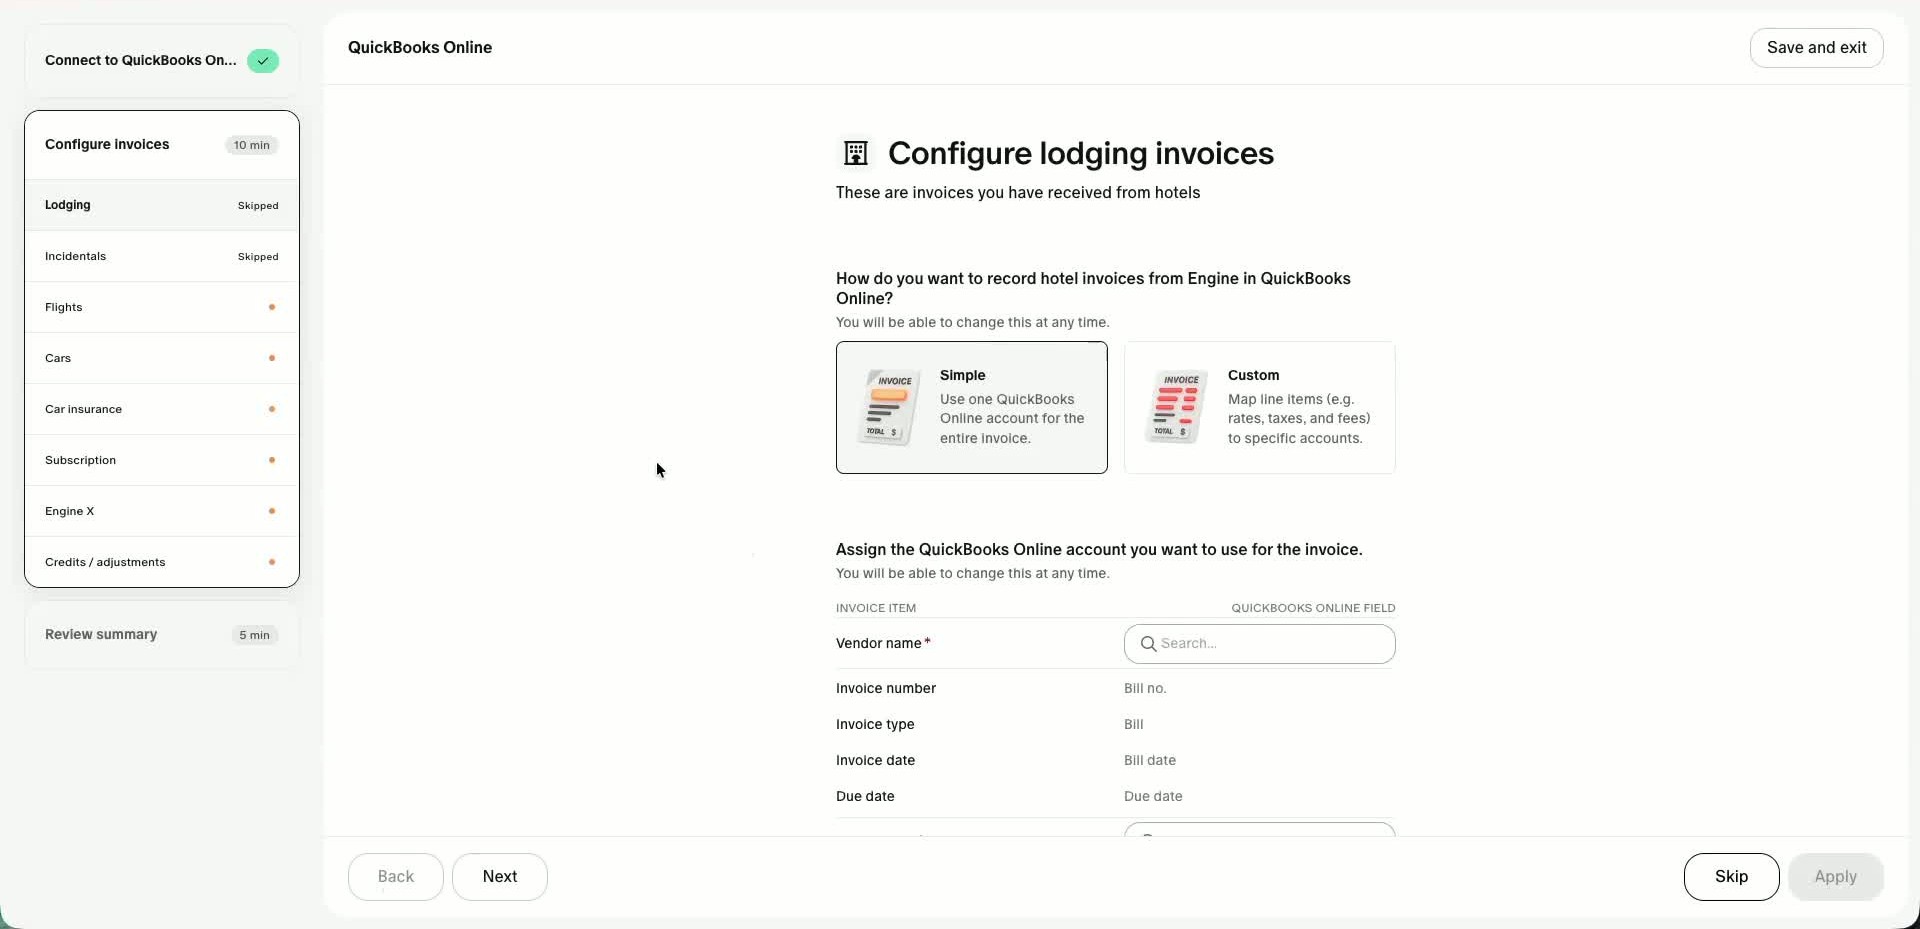
- At the top of each invoice type setup, there are two mapping options:
- Simple mapping
- Custom mapping
- Simple mapping sends the total invoice amount as one bill in QuickBooks.
- Custom mapping lets you map line items to different accounts.
- Custom mapping is more flexible, but simple mapping is usually enough for most customers.
6. Map the lodging bill details
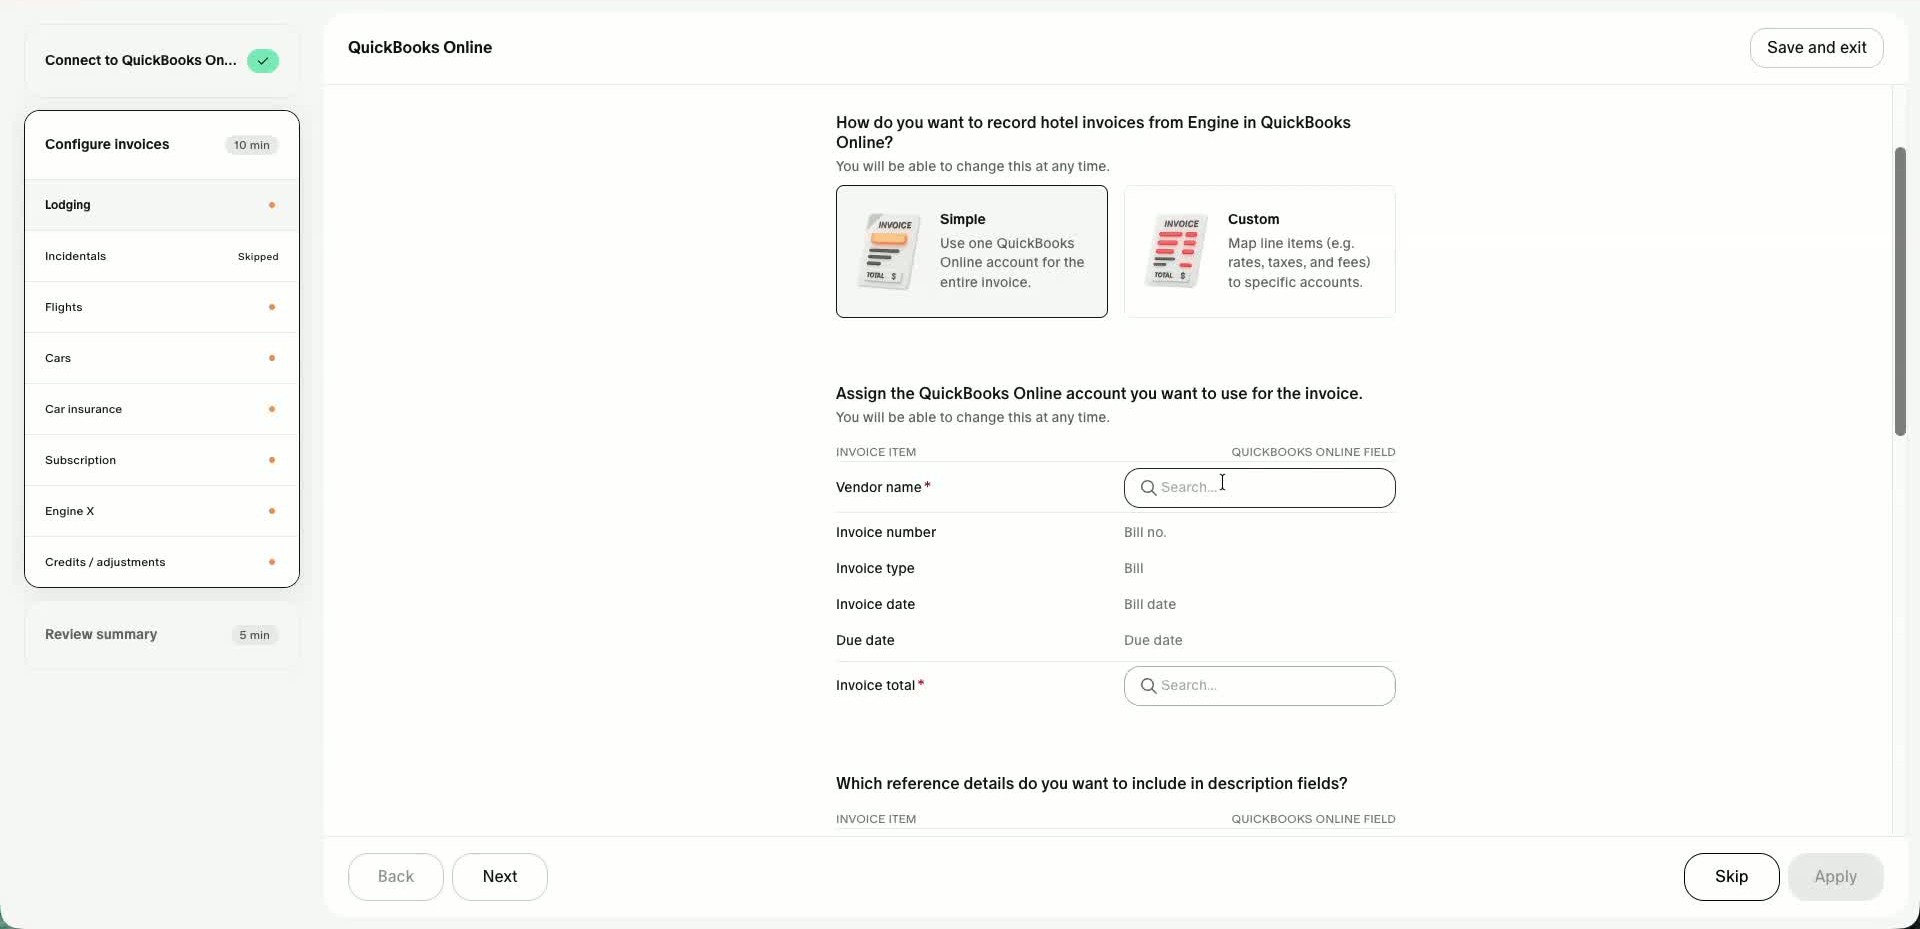
- Choose the vendor name from the synced vendor list; this becomes the vendor on the QuickBooks bill. You should choose Engine (or whichever custom name you have configured for Engine in your QBO account).
- Choose the invoice total account, which determines the expense account the bill hits.
- Because Engine synced the chart of accounts, you can select from your own QuickBooks accounts in this dropdown.
- This is where the bill's core accounting destination is defined.
7. Map standard Engine fields to QuickBooks fields
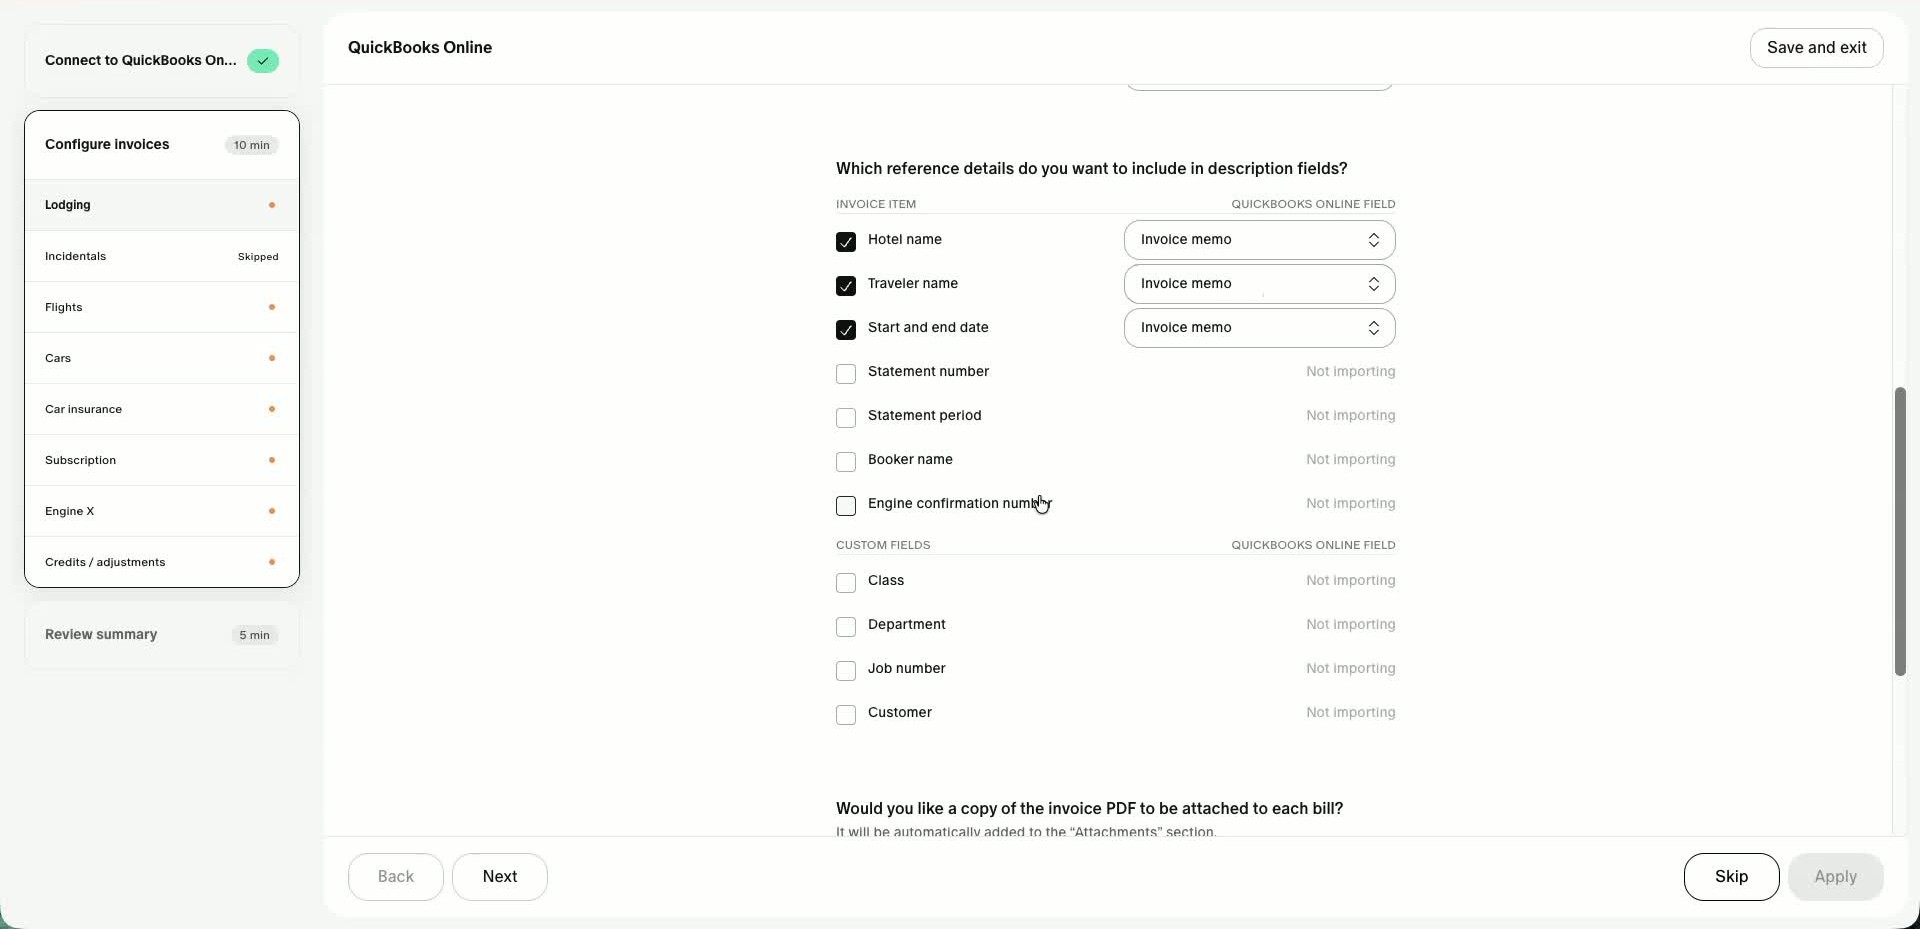
- Standard Engine fields can be sent as metadata on the QuickBooks bill.
- These fields can map to either:
- Invoice Memo at the header level, or
- Invoice Total Line Item as a line-item description
- These are free-text fields, so multiple values can be concatenated there.
- This is useful for passing through general context without strict value matching.
8. Map custom fields carefully
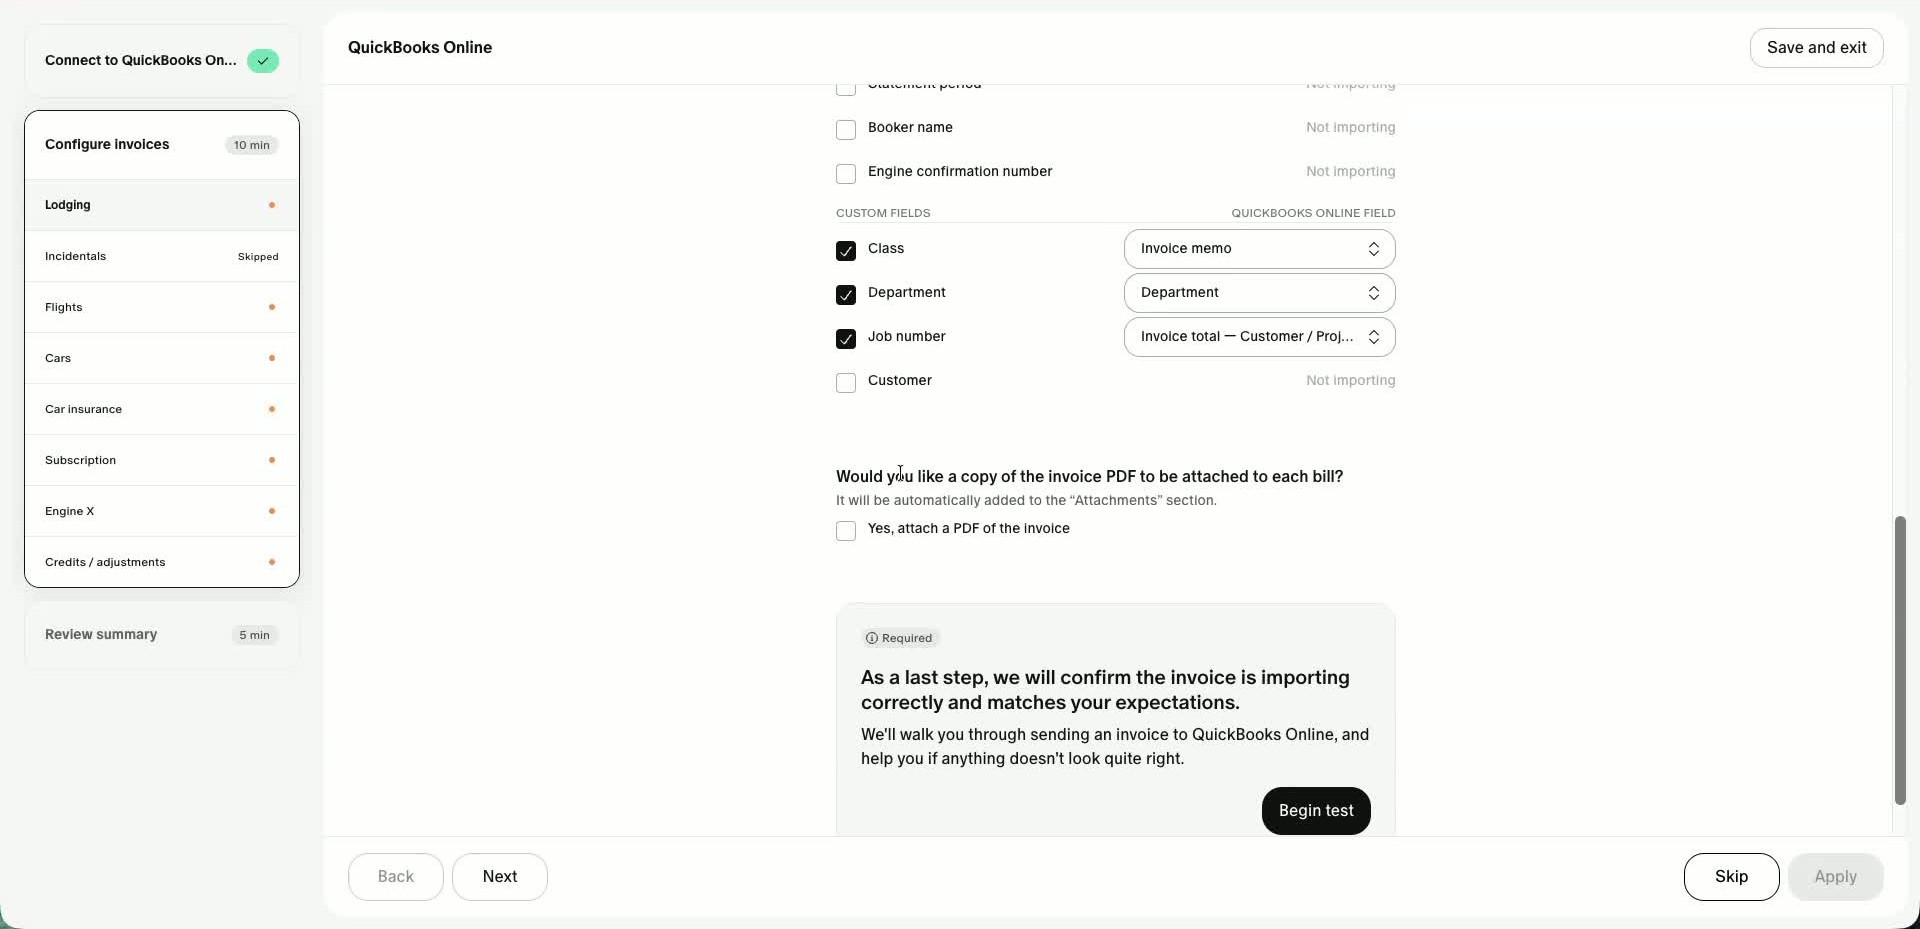
- Custom Engine fields can map to specific QuickBooks targets.
- Examples shown:
- Class
- Department
- Job Number
- Some targets are header-level fields, while others appear in specific QuickBooks columns like Customer/Project, which will be displayed on the configuration screen as Invoice total — Customer / Project.
- Example guidance:
- Job number often maps well to Customer/Project
- Department can map directly to Department
- Class can be mapped to Memo if needed, or Class if you use this field in QBO.
- Be careful with non-free-text fields: the value in Engine must exactly match the valid value in QuickBooks, or sync errors can occur.
- You can choose to attach a PDF invoice to the QuickBooks bill using the checkbox.
9. Run a test invoice
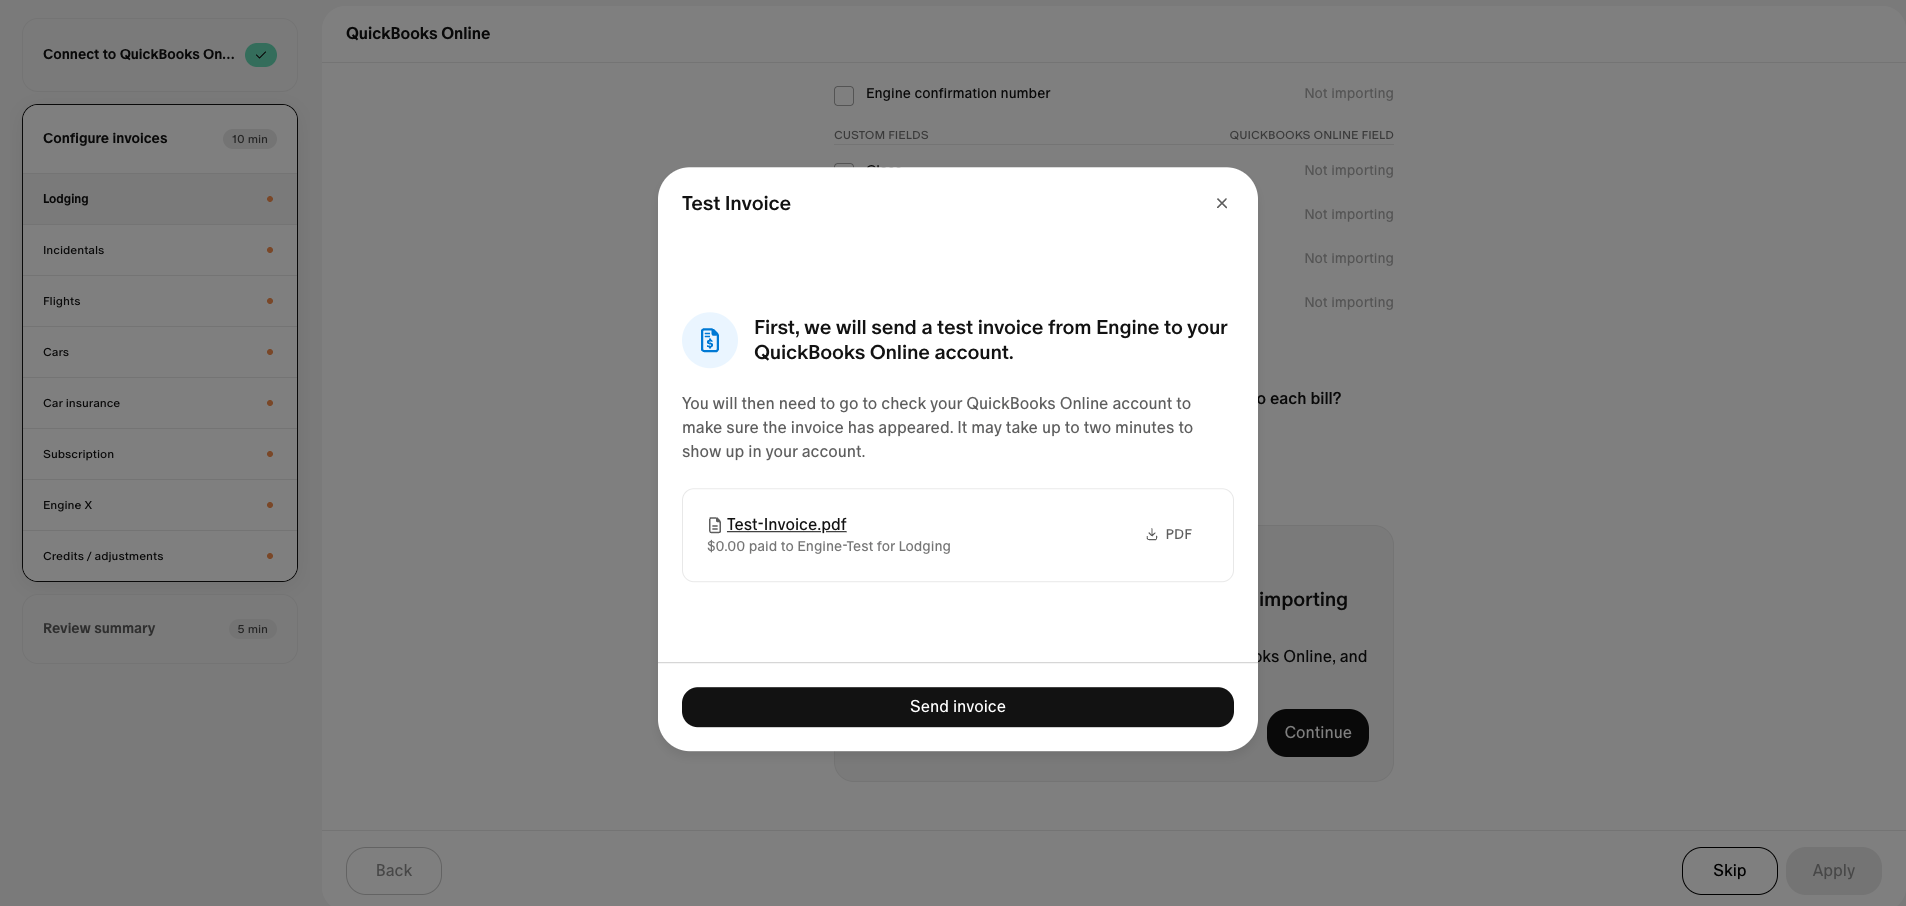
- Before applying the setup, you must run a test invoice.
- The test invoice is a $0 invoice used to confirm QuickBooks can receive data from Engine.
- After sending, verify the invoice appears in QuickBooks in real time.
- Once confirmed, click I see the invoice in QuickBooks, confirm everything looks good, and continue.
- Note: you will not be able to verify custom field mappings using the test invoice. These will need to be validated using a real booking after setup.
10. Apply the configuration and finish setup
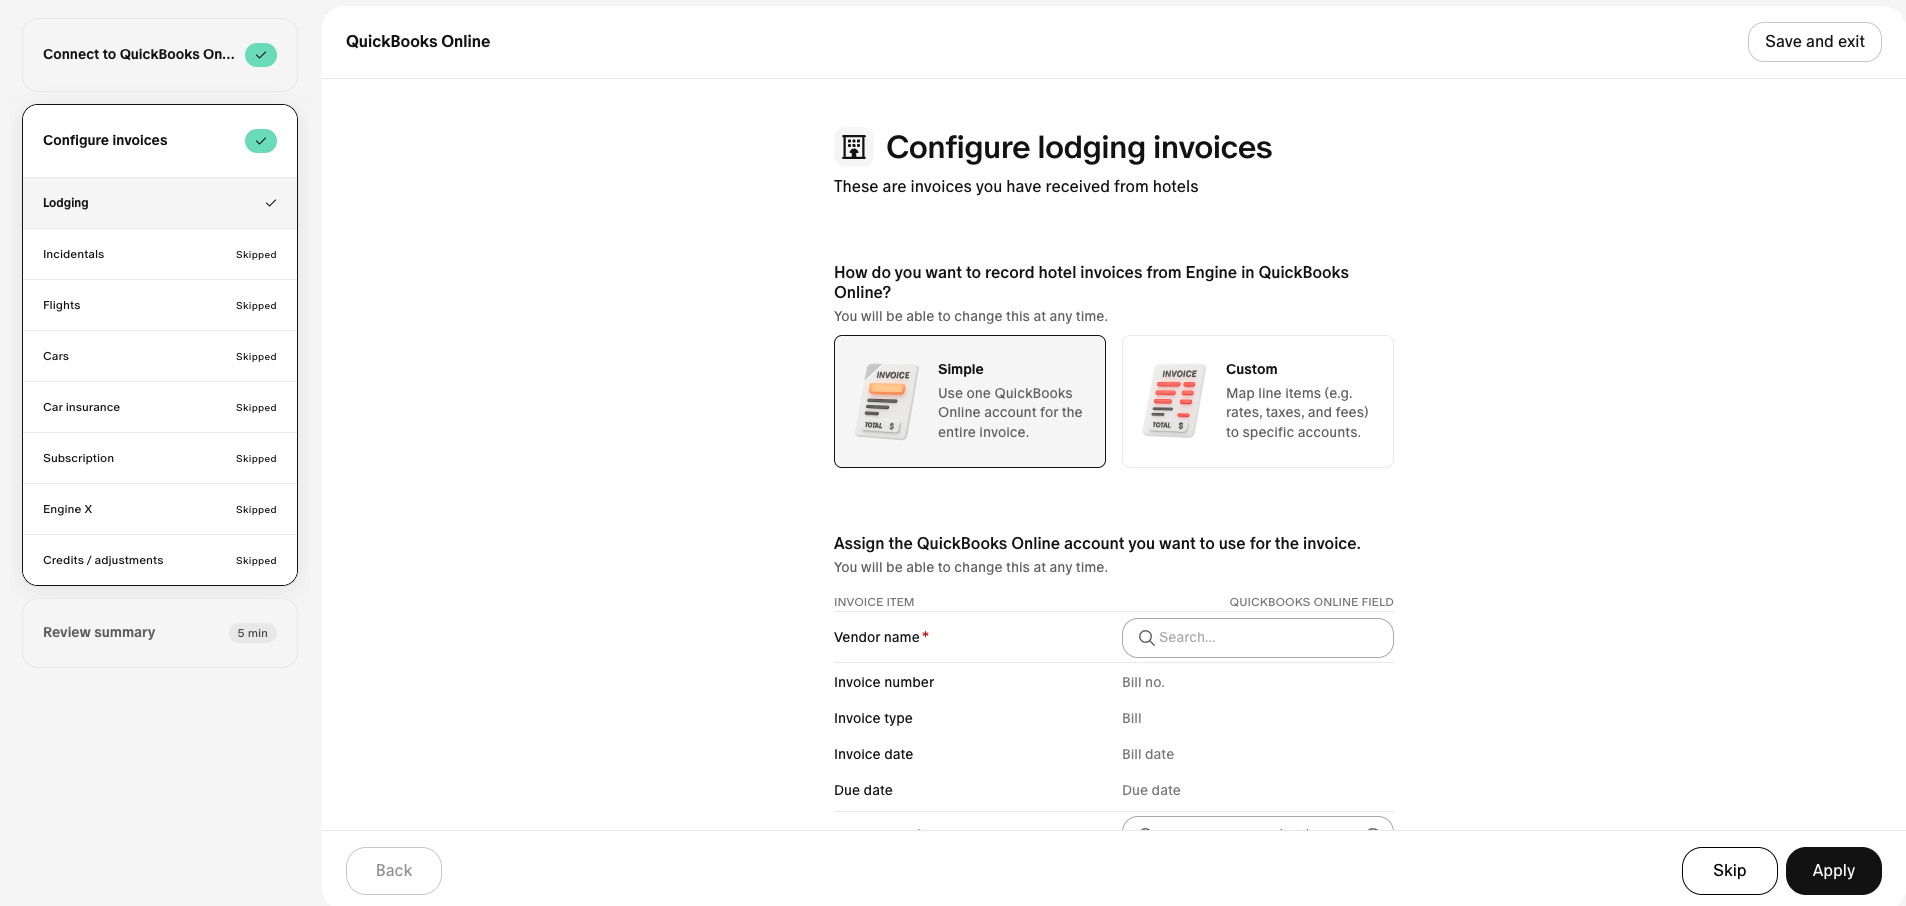
- You must click Apply to save the configuration.
- Once applied, the invoice type shows as fully set up.
- In the demo, lodging is configured and the other invoice types are skipped.
- At the end, you will see a summary where you can click Submit.
- The QuickBooks Online integration is now active.
11. Understand when invoices actually sync
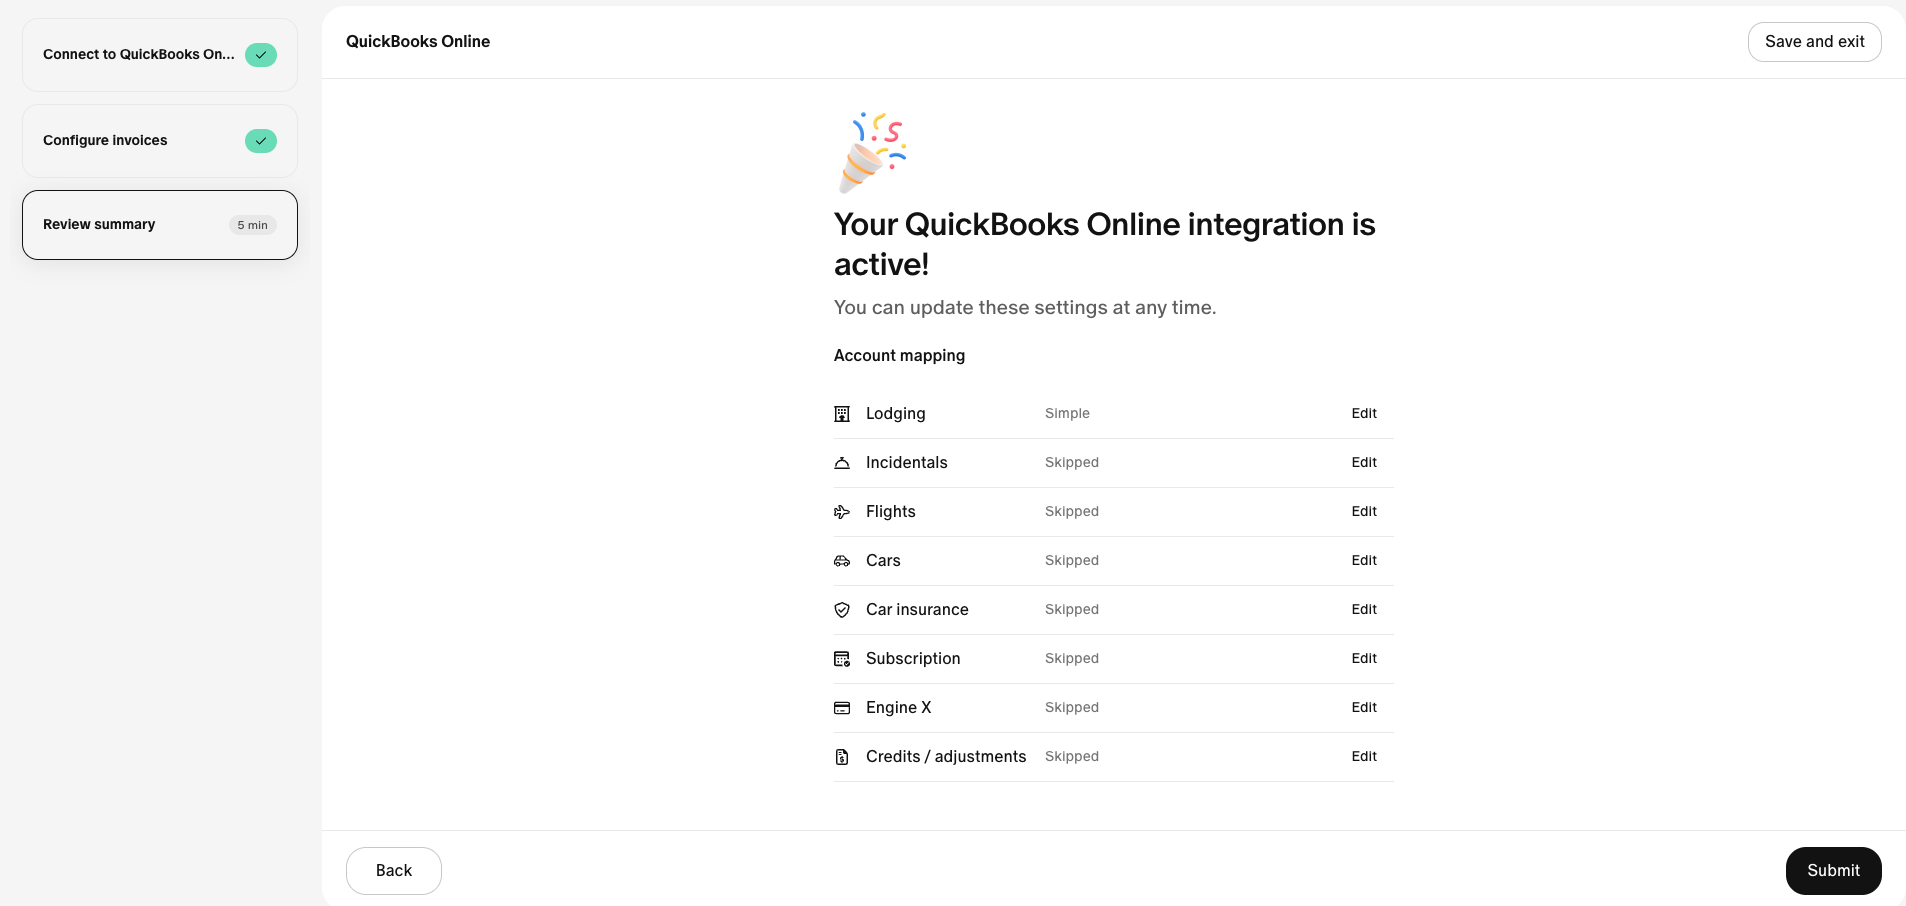
- Bills do not sync immediately after setup.
- Actual invoice syncing begins when your next statement drops.
- That sync includes all bills from the statement period.
12. Use the Billing tab to monitor sync status
- After setup, you will get a new view under Billing called QuickBooks Online Sync.
- This page shows all bills Engine attempted to sync to QuickBooks.
- It also shows whether each sync succeeded or failed.
- If there is a mismatch or error, you can investigate and resolve it in the UI.
- Once fixed, Engine will automatically try to re-sync the bill.